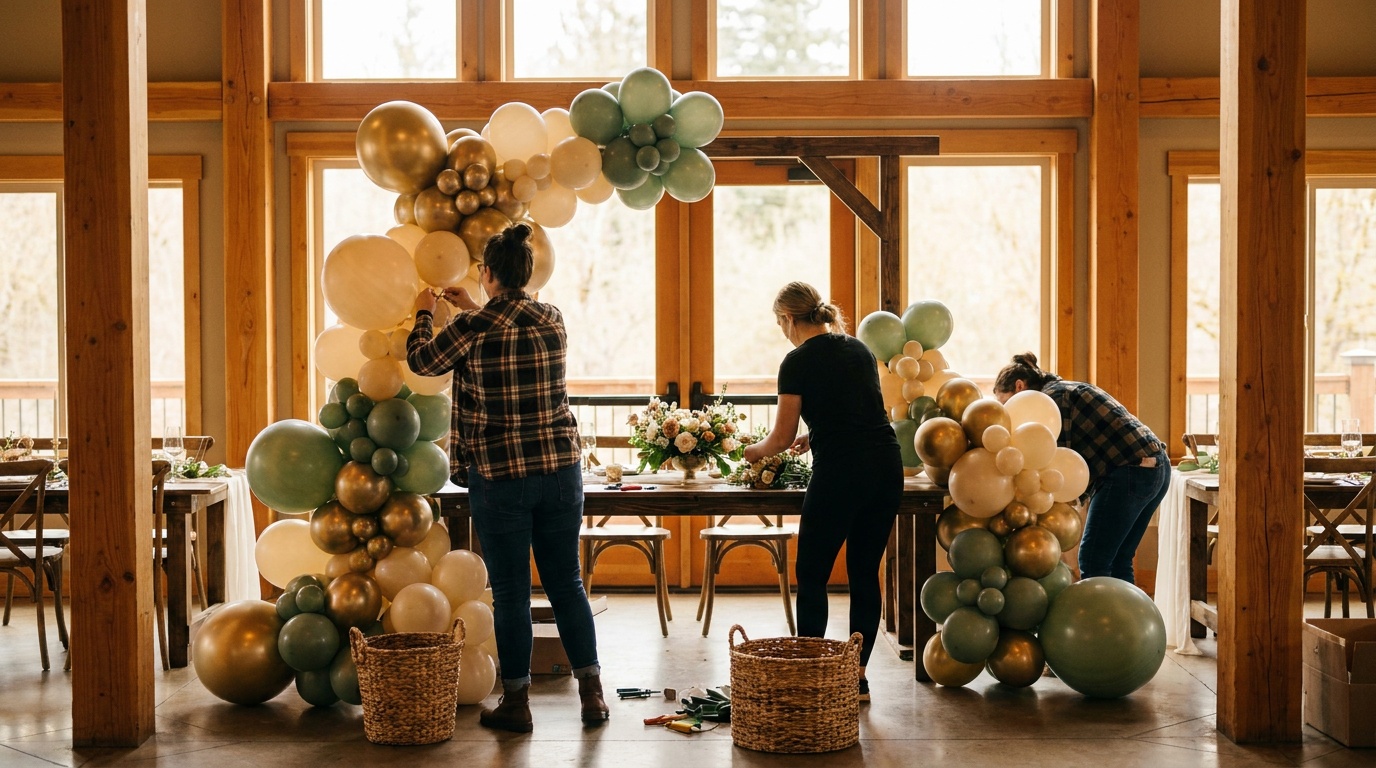
Planning a wedding in Auburn, Kent, Renton, or elsewhere across South King County? If you're wondering how to decorate with balloons for weddings, you're tapping into one of the most impactful, Instagram-worthy décor trends in modern celebrations. Balloon installations transform any venue—from intimate backyards to grand ballrooms—into a stunning, memorable space that guests won't stop photographing.
But here's the thing: doing it right takes strategy, taste, and hands-on execution. Let's walk through exactly how to pull off a stunning balloon wedding that feels effortless and looks absolutely show-stopping.
What You'll Need
Before diving into the steps, gather these essentials:
- Color palette — 3–5 colors that match your wedding theme (pastels, jewel tones, metallics, etc.)
- Venue measurements — Height of ceilings, width of walls, entrance dimensions
- Balloon varieties — Standard latex (36–60 inches), foil/mylar (for accents), qualatex (premium latex)
- Anchoring supplies — Fishing line, command hooks, clear tape, balloon bases
- Design reference images — Pinterest or Instagram photos showing your vision
- Timeline — Confirm delivery and setup hours with your venue
- Professional installer — Or a trusted crew (like Balloon Decor NW) to handle the legwork
Step 1: Define Your Wedding Theme & Color Story
Before a single balloon is inflated, nail down your aesthetic. Are you going romantic and blush-toned? Modern and metallics? Tropical and vibrant? Garden-fresh pastels?
Your color palette is the foundation of the entire installation. Pull 3–5 colors maximum—too many dilutes the impact. Think cream, blush, and gold. Or navy, ivory, and rose. Or sage green, white, and champagne.
Why it matters: A cohesive color story makes your space feel intentional and elevated. Mismatched colors read as chaotic, no matter how beautiful the individual balloons are.
Pro tip: Grab paint swatches from a hardware store and lay them out in your venue's lighting. Natural light changes how colors feel—what looks perfect under studio lights might read differently in an outdoor garden.
Step 2: Choose Your Balloon Installation Focal Points
You don't need balloons everywhere. Strategic placement is what separates "wow" from "too much."
Primary focal points include:
- Entrance arch — The first impression. Guests walk through it as they arrive, making it the most photographed moment.
- Photo backdrop wall — A full balloon wall behind where the couple stands for portraits and guest selfies.
- Escort card table — Garland or arch framing the table where guests find their seat assignments.
- Dessert or gift table — A smaller garland or cluster adding elegance without overwhelming the space.
- Dance floor edge or ceiling — Subtle balloon accents that frame the action without blocking sight lines.
Choose 2–4 focal points, not all five. Less is often more elegant.
Why it matters: Focused installations look intentional and create natural photo zones. Over-decorating every inch dilutes the impact and can feel cluttered.
Pro tip: Map your venue layout on paper. Mark where natural light enters, where guests will gather, and where photos will happen. Place balloons strategically in those zones.
Step 3: Select Balloon Styles & Textures
Not all balloons are created equal. Understanding the options changes everything.
Balloon types:
- Standard latex balloons — Classic, affordable, come in every color. 11–36 inches. Perfect for arches and garlands.
- Foil/mylar balloons — Shiny, metallic finish. Great for sparkle and accents. Last longer than latex.
- Jumbo balloons — 36–60 inches. Make a bold statement as focal points. Expensive but unforgettable.
- Pastel balloons — Soft, muted tones. Romantic and sophisticated. Pair beautifully with metallics.
- Chrome/pearl balloons — Reflective finish. Ultra-premium look. Perfect for upscale weddings.
Mix textures. A garland of pastel latex with rose gold metallic accents reads richer than all one type.
Why it matters: Texture variation creates visual depth and sophistication. A monochromatic, single-texture installation can feel flat or cheap.
Pro tip: Order samples of balloons you're considering. See them in your venue lighting before committing to 200 balloons in a color you've only seen online.
Step 4: Design Your Arch or Entrance Statement
The entrance arch is the hero piece. It's the first thing guests see and the backdrop for arrival photos.
Arch design fundamentals:
- Height — Measure your venue ceiling. Arches typically run 7–9 feet tall, but adjust to venue dimensions.
- Width — Standard doorway? 6–7 feet. Grand ballroom entrance? 12+ feet. Oversized arches feel more dramatic.
- Density — Packed arches (lots of balloons clustered tightly) look lush and romantic. Loose arches (fewer balloons with space) read modern and minimal.
- Color flow — Gradient (fading from one color to another) or ombré (blending multiple colors) feels artistic. Blocked color sections feel graphic and structured.
- Embellishments — Fresh florals woven into the arch, ribbons, gauze draping, or greenery elevate the look.
Why it matters: An arch sets the tone for your entire event aesthetic. It's where guests form their first impression and where 80% of arrival photos happen.
Pro tip: If you're hiring a professional installer, share mood board images and exact measurements. Clear communication prevents surprises on event day.
Step 5: Plan Custom Garlands for Tables & Accents
Garlands are the workhorse of balloon décor. They frame tables, define spaces, and add movement to a room.
Garland placement:
- Dessert/gift table — Drape behind or frame the front of the table.
- Escort card or seating table — Soften the edges and draw eyes to the table.
- Dance floor perimeter — Create a glowing, enclosed dance space.
- Staircase or ramp — Guide guests and add dimension to the venue's architecture.
- Ceiling swags — Drape from corner to corner for drama and height.
Garland design:
- Organic/loose style — Balloons of varying sizes clustered asymmetrically. Trendy and romantic.
- Tight spiral — Balloons tightly coiled around a rope or fishing line. Clean and structured.
- Balloon grid — Precise, aligned balloons. Modern and geometric.
Mix sizes within a single garland (11-inch, 16-inch, 36-inch balloons together) for richness. A garland of uniform balloon sizes can look repetitive.
Why it matters: Garlands soften the hard edges of tables and venues while drawing the eye where you want it. They're also budget-friendly compared to full-wall installations.
Pro tip: Garlands are often hung 24 hours before your event. Confirm with your venue that this timing works and that you can access the space early.
Step 6: Create a Photo Backdrop Wall
A full balloon wall serves as your event's signature selfie station. Every guest will take a photo in front of it. Make it count.
Backdrop sizing:
- Minimum — 8 feet wide × 7 feet tall. Large enough for a couple to stand comfortably in frame.
- Standard — 10–12 feet wide × 8–9 feet tall. Works for most venues and framing.
- Grand — 15+ feet wide. Fills an entire wall and creates an immersive focal point.
Design approaches:
- Solid color block — All one color for a sleek, modern look.
- Gradient/ombré — Colors fade from one to another. Romantic and eye-catching.
- Geometric pattern — Blocked sections of color arranged in grid or chevron patterns. Bold and contemporary.
- Mixed textures — Matte latex, shiny foil, and large jumbo balloons layered together. Luxe and visually rich.
Add accents like florals, greenery, a monogram, or the couple's initials cut from foamboard to personalize the backdrop.
Why it matters: A photo backdrop gives guests a designated, gorgeous selfie spot. Those photos end up on social media, extending your wedding's reach and creating lasting memories of your décor.
Pro tip: Ensure adequate lighting on your backdrop (natural light or uplighting). A beautiful wall looks terrible in shadows. Position it where light flatters the colors.
Step 7: Confirm Setup & Teardown Logistics
Here's where many couples stumble—underestimating the time and labor involved in setup and teardown.
Setup questions to nail down:
- What time can the installer access the venue?
- How many hours will setup take?
- Are there load-in restrictions (elevator size, doorway width, parking proximity)?
- Will the venue provide tables, stands, or rigging points for anchoring?
- Is there an outdoor setup required, and what's the weather forecast?
Teardown logistics:
- Who removes the balloons after the event?
- When can removal happen (same night, next morning)?
- Where do deflated balloons go (recycling, trash, etc.)?
- Are there any venue-specific cleanup requirements?
Why it matters: Vague setup logistics cause day-of stress, delays, and sometimes incomplete installations. A professional installer (like Balloon Decor NW) handles this entirely, but if you're coordinating independently, lock these details down weeks ahead.
Pro tip: Get everything in writing—a quote, timeline, setup/teardown agreement, and contact person. Surprises on wedding day are never fun.
Step 8: Order Early & Confirm Details 4–6 Weeks Out
Balloon weddings aren't last-minute projects. Peak wedding season (May–September) books up fast, and custom orders take time to source and prepare.
Timeline:
- 8 weeks out: Decide on balloon décor and get a quote from installers.
- 6 weeks out: Book your balloon designer/installer. Finalize color palette and design concepts.
- 4 weeks out: Confirm all venue logistics, measurements, and timing. Finalize design details.
- 2 weeks out: Review final design plan with installer. Confirm delivery address and setup time.
- 1 week out: Weather check for outdoor events. Final headcount for any adjustments.
- Day before/day of: Installer arrives, sets up, confirms everything looks perfect. You show up and celebrate.
Why it matters: Early booking ensures availability and gives your installer time to source specialty balloons, plan the design thoughtfully, and prepare materials. Last-minute orders often result in limited color options or rushed setups.
Pro tip: Once you've booked, stay in touch with your installer. Share venue updates, guest count changes, or any last-minute décor ideas. Good communication leads to a better final product.
Common Mistakes to Avoid
Overdoing it. Not every surface needs balloons. Restraint reads as sophistication. Choose 3–4 focal points, not twenty.
Ignoring venue logistics. A gorgeous design means nothing if it doesn't fit through the venue's doors or doesn't anchor safely to the ceiling. Always confirm measurements and installation points early.
Mismatched color palette. More colors ≠ better. Stick to 3–5 cohesive colors. Clashing tones make the whole installation feel chaotic.
Skipping the timeline. Rushing a balloon installation results in uneven arches, poorly secured garlands, and day-of headaches. Book 4–6 weeks out and give your installer breathing room.
Going solo on large installations. Balloon work is labor-intensive and requires specialized knowledge (secure rigging, design flow, problem-solving on the fly). For weddings, a professional crew is worth every penny. Check out What Is a Balloon Installation Service? to understand what professionals bring to the table.
Not coordinating with your florist. If you're mixing balloon décor with fresh florals, your balloon designer and florist need to communicate. Competing designs or conflicting colors create visual chaos.
Underestimating weather (outdoor events). Wind, heat, and humidity affect balloon longevity. Plan accordingly and have a backup plan for outdoor weddings.
The Bottom Line: Why Professional Installation Matters
While balloon décor is tempting to DIY, weddings are high-stakes events. A full installation with arches, garlands, and backdrops takes 6–10+ hours, specialized equipment (ladders, fishing line, anchor points), and design expertise that's hard to replicate without experience.
Professional installers—especially those familiar with South King County venues like parks in Auburn, banquet halls in Renton, or outdoor gardens in Kent—understand structural challenges, timing pressures, and how to problem-solve on the fly. They also handle teardown, so you're not cleaning up at midnight in a wedding dress.
For couples planning weddings in the area, consider checking out resources like Wedding Balloon Decorations Seattle: Make Every Moment Stunning and Wedding Balloon Arch Decorations Renton for deeper inspiration.
FAQ
Q: How much does wedding balloon decoration cost? A: Costs vary based on complexity, venue size, and design scope. Simple arches start around $300–500, while full venue transformations with custom garlands and backdrops range $800–2,500+. Contact us for a personalized quote.
Q: How far in advance should I book balloon decorations? A: Ideally 4–6 weeks ahead, especially for peak wedding season (spring/summer). This ensures availability and gives us time to finalize your design vision and color palette with you.
Q: Can balloon decorations survive outdoor weather? A: Most standard balloons hold up well in mild conditions, but wind, extreme heat, and rain can damage them. For outdoor weddings, we use weather-resistant balloons and strategic placement to minimize risk.
Q: Do you offer same-day setup for weddings? A: Yes, we typically arrive 1–2 hours before your event to set up. For large installations, we may coordinate a day-before setup. We'll finalize timing during your consultation.
Ready to transform your South King County wedding with stunning balloon décor? Get in touch with Balloon Decor NW. Call 253-218-5790 or send us a message. We serve Kent, Renton, Auburn, Federal Way, Tukwila, and Burien—and we'd love to bring your vision to life.
Keep Reading
- Minnidip Balloon Garland — dense, romantic mini-balloon garlands perfect for wedding ceremonies and receptions